
Working with Epoxy: The Basics
Posted by B&B Yacht Designs on Jan 1st 2018
Note: Applies to all brands of epoxy including B&B Brand 2:1 Epoxy.
Safety
Always wear gloves and old clothing when working with epoxy it is very difficult to remove from fabric. Denatured alcohol is the preferred solvent for cleaning skin of epoxy. Some people notice a smell from epoxy and we always recommend wearing a respirator when using epoxy in an enclosed space.
Mixing
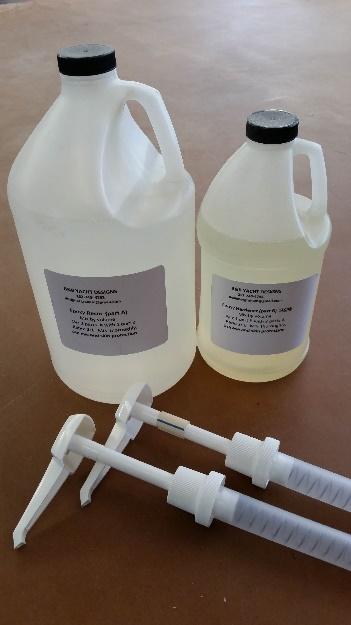
Our epoxy is a 2:1 mix ratio meaning 2 parts resin to 1 part hardener by volume. Our pumps are calibrated using a “stopper sleeve” cut to a precise length which stops the hardener pump stroke at the 1/2 way mark. The pump with the sleeve is for the HARDENER. When mixing, 1 pump of resin and 1 pump (which is actually a half pump) of hardener is combined in a small cup. Mix with a stick until the epoxy appears clear and even (about a minute) then mix for another minute. Poorly mixed epoxy is the principal cause of epoxy not curing properly. If you lose count when pumping epoxy into a mixing cup THROW IT OUT! It is not worth using it on the boat and then having to scrape it all out if it does not cure. Up to about 6 pumps can be dispensed at once for a large coating job but do NOT leave the mixed epoxy in the cup as curing epoxy is exothermic which means that heat is generated as it cures. Spread out the epoxy soon after mixing to prolong the working time.
Coat all the wood
Always coat all surface with 3 coats of epoxy before primer and paint. This protects the wood from moisture which is the primary cause of cracks and delamination. Properly coated in epoxy and painted, the wood will be preserved indefinitely.
Overcoat window
Epoxy can be over-coated without sanding if done within 12-18 hours of the last coat at room temperature. The sooner the better, once the last epoxy coat is not sticky to the touch the next coat can be applied. If in doubt wait and then sand the previous coat with 80 grit sandpaper to remove all shiny spots and ensure a good secondary bond. Typically 2 coats can be applied in a day and a third coat the following morning. This sequence means only one round of sanding at the very end is needed before priming and painting.
Thicken epoxy for gluing
Always use cabosil or some thickening agent such as our B&B “special blend” thickener with epoxy whenever gluing or bonding two pieces of wood together. Thickening the epoxy allows it to fill gaps and increase the area of the mating surface which makes for a strong watertight bond. Whenever you glue two pieces together look for the telltale “sqeeze-out” of glue around the edges. This ensures a good bond. Add thickeners to mixed epoxy a bit at a time stirring carefully so as not to release it into the air. Continue adding filler until the desired consistency is reached. For fairing a taped seam or low spot we use microspheres which are a light weight and easy to sand epoxy thickner. Cabosil by comparison is hard to sand which makes it good for gluing.
Prepping for Paint
We recommend washing the cured epoxy surface with soapy water and rinsing with water before beginning to apply any paint system. This helps to remove dust as well as any uncured particles of epoxy that may affect the paint system. Always start with a small sample area to ensure that your paint is compatible with epoxy. We recommend epoxy primers such as Awlgrip 545 and 2 part polyurethane paints due to their long life and durability but they do come with nasty fumes and your work area must be well ventilated or better yet, pull the boat outside and work in open air with a respirator. Single parts paints are a good choice if you do not have the capabilities for spraying paint or don’t want to offend the neighbors.
Working in Hot weather
In hot weather it is even more important not to leave mixed epoxy in the mixing pot any longer than necessary. If your mixing cup begins to get hot to the touch or you see steam coming up out of the pot, just put it down and let it kick off. It has already started to kick and likely is full of hard lumps it may even be smoking with heat as the exothermic reaction runs its course.
Do not attempt to work with epoxy in direct sunlight. Don’t be tempted to speed up cure times by setting your work outside in the sun. Fillets can overhead and crack and plywood outgasses causing hundreds of bubbles to form in wet epoxy coats.
Working in Cold Weather
Working with epoxy in the cold can be frustrating because epoxy must be above about 50 deg in order to kick fully. When we must work in a cold environment, we carefully use heat lamps or heaters to locally warm the area we are working in. Epoxy should be kept warm in the jugs to make dispensing easy and help when mixing as cold epoxy does not mix easily. A heat lamp or block heater can be used to keep epoxy containers warm.
Epoxy resin stored below about 40 deg. F for a period of weeks will crystalize and form a solid layer in the bottom of the jug. This happens with ALL epoxies. The resin can be easily brought back to a homogeneous state by warming it. The easiest way is to put the whole jug in the microwave for about a minute at a time until the resin goes completely clear again. Another method is to immerse the jug in a pot of boiling water until the contents turn completely clear.
Filleting and using Fiberglass Tape
The following is the step by step procedure recommended by B&B for filleting, fiberglassing and coating any plywood joints in our kits. The size of the fillet required is a function of the thickness of the plywood being joined. The majority of joints will be between 6mm or 9mm plywood. For these joints a fillet diameter of 3/4” to 7/8” is sufficient.
Dry Fit First
The first step is to roll out the fiberglass tape and lay it in the joints dry fitting and cutting all of the pieces of fiberglass to fit. This prevents contaminating the roll of fiberglass with wet epoxy. Overlapping the glass tape in the corners is fine but too many layers can cause the glass not to lay flat creating air bubbles. Butting the ends of the glass strips together at the corners is sufficient for strength.
Clear the Joint
Use your fillet tool to make sure that any tack welds or cured epoxy from previous steps are below the level of the filet and that nothing will obstruct the fillet tool. Sand down or smooth tack welds as needed. Vacuum or brush out the area of anything that could be trapped under the fiberglass and cause a bubble.
Apply a Fillet
Apply a smooth even fillet to all joints that will be glassed. Work neatly and clean up the excess epoxy with a putty knife. A clean job will pay off later making the glass tape easy to apply smoothly and without air bubbles. Allow the fillet to cure for a few hours or until it is still gummy to the touch and impressionable like modeling clay. This allows you to mash down any peaks that may have been left during filleting that will snag the fiberglass and create stubborn bubbles. Apply the fiberglass before the fillet is fully cured to avoid unnecessary sanding.
Wet-out the Fiberglass
It is very difficult and messy to wet out fiberglass in a vertical position. A work table covered in plastic sheet is ideal for wetting out glass tape outside the boat. Pour a line of epoxy right over the glass tape and spread out with a putty knife or wide brush. Use a little at first, you will soon get the hang of how much epoxy is needed. Allow fiberglass to soak for a moment. It should be totally clear and there should be no white spots indicating that the fiberglass is starved of epoxy or contaminated with something preventing it from absorbing epoxy.
Coat the Joint
Meanwhile, brush a thin coat of epoxy over the fillet and a few inches on either side of the joint where the glass will be applied. Lay the glass strip over the joint and smooth it out. A 2” wide chip brush works well for this.
Remove Excess Epoxy
Check that you don’t have an unnecessary amount of epoxy over the joints. Too much and the fiberglass can float in it. You should still be able to see the weave of the fiberglass at this stage. If you see glossy mirror smooth puddles of epoxy try to soak them up with a brush and scrape it off into a waste container.
Watch out for bubbles
There are usually a few places (especially in corners) that pull air under the glass and create an air bubble no matter how many times you smooth them out. Come back to your work in a few hours when the epoxy is starting to get tacky and you mash the air bubbles out for good.
Smooth out the Edges
The edges of the fiberglass tape usually come out a bit rough and need to be smoothed out before continuing. If you return to your work within 12 hours before the epoxy has completely cured but is now pretty hard and no longer tacky to the touch then you can use a scraper to scrape the hard edge of the fiberglass tape smooth and continue with sealing coats. If you wait any longer (depending on temperature) you must lightly sand down the fiberglass to key the surface and prepare it for a secondary bond. Any fully cured epoxy (after 24 hours at room temperature) must have all the gloss sanded off before more epoxy should be added.
Coat Everything
Once your fiberglass tape edges are smoothed out you can roll a coat of epoxy over everything. Foam rollers work best for coating followed by a foam brush to pop any air bubbles. It is impossible to apply an even coat of epoxy with only a brush because of its viscosity. Second and third sealing coats of epoxy can be applied over each other without sanding provided that they are done within the curing window (~24hrs at 70 degrees F).
Sand for a Smoother Finish
Three coats of epoxy and no sanding is perfectly adequate for protection from moisture but sometimes a smoother surface finish is desired. Allowing the second coat of epoxy to fully cure and sanding with 80 grit sandpaper before applying the third coat will create a glossy smooth surface.
Epoxy Coating and Finishing
The plywood epoxy building method relies on a barrier coat of epoxy to completely encapsulate the wood from moisture. All surfaces of the boat should be coated with 3 coats of epoxy before finishing. These sealing coats can be applied one after the other within the curing window (not more than 18 hours at room temperature and less at higher temperatures) in order to reduce sanding.
Once the boat is encapsulated and sanded to an 80 grit finish, the hull is waterproof and ready for final finishing. There are many ways to finish the hull but it must be protected from the UV light of the sun with either paint or varnish or the epoxy will break down after just a few months of use depending on exposure.
Varnishing highlights the natural beauty of the wood but it must be cared for and reapplied annually depending on its exposure to the sun or the epoxy will go unprotected. A good quality two part polyurethane paint can last for decades in the sun without ever needing to be recoated and it is the recommended finish for this reason.
A two part polyurethane paint is a hard glossy coating that resists stains and mildew and retains its gloss for many years. There are many brands such as Awlgrip, Devoe, and Alexseal that can be found online for home builders. These paints should be applied outdoors with plenty of ventilation and a respirator. There are water based, two part paint, alternatives such as System Three LPU that are also very good if you are sensitive to paint fumes. It may be tempting to buy a can of cheap one part exterior paint from the hardware store but experience has shown that such paints mildew and stain, and do not hold up as well after the first few years of use making a complete overhaul an inevitability.
One part boat paints are getting better and better so if you are not comfortable with a two part polyurethane we suggest you purchase a high quality single part coating designed to be used on boats.
Unless you have experience with the paint you choose, it is good practice to test it out on a section of cured epoxy to make sure there is no unexpected reaction. In rare cases, the chemicals in certain paints react with the epoxy coating and prevent the paint from fully hardening.
There is nothing wrong with applying paint directly to your sealed and sanded hull, however if you desire a glossy smooth finish on the outside you may be disappointed with the results. Any imperfection will show through the paint and will be accentuated by the gloss. If a glossy finish is desired from a two part polyurethane coating, it is common practice to first fair the hull and paint with a primer. A two part “high build” epoxy primer such as Awlgrip 545 is the best to prepare the surface for the top coat. Additionally, the fiberglass tape on the outside of the hull can be faired in first using epoxy thickened with a fairing filler such as microspheres and a putty knife to blend it into the hull sides. The epoxy primer which is applied after the fairing of the fiberglass tape is easily sanded and used to fair any imperfections in the epoxy coating and provide an even consistent surface for the top coat. It is typically sanded to about a 320 grit finish before the top coat is applied.
Two part polyurethane paint can be applied using the “roll and tip” method with a foam roller (not a nap roller) and a foam brush. Roll the paint on VERY thin and then pop any bubbles by lightly wiping the surface with the foam brush. Allow a few hours between coats for the paint to skin over before applying a second or third coat depending on color coverage. There are many tutorials and guides available online and on youtube for painting boats using two part polyurethane paints.